
Profile
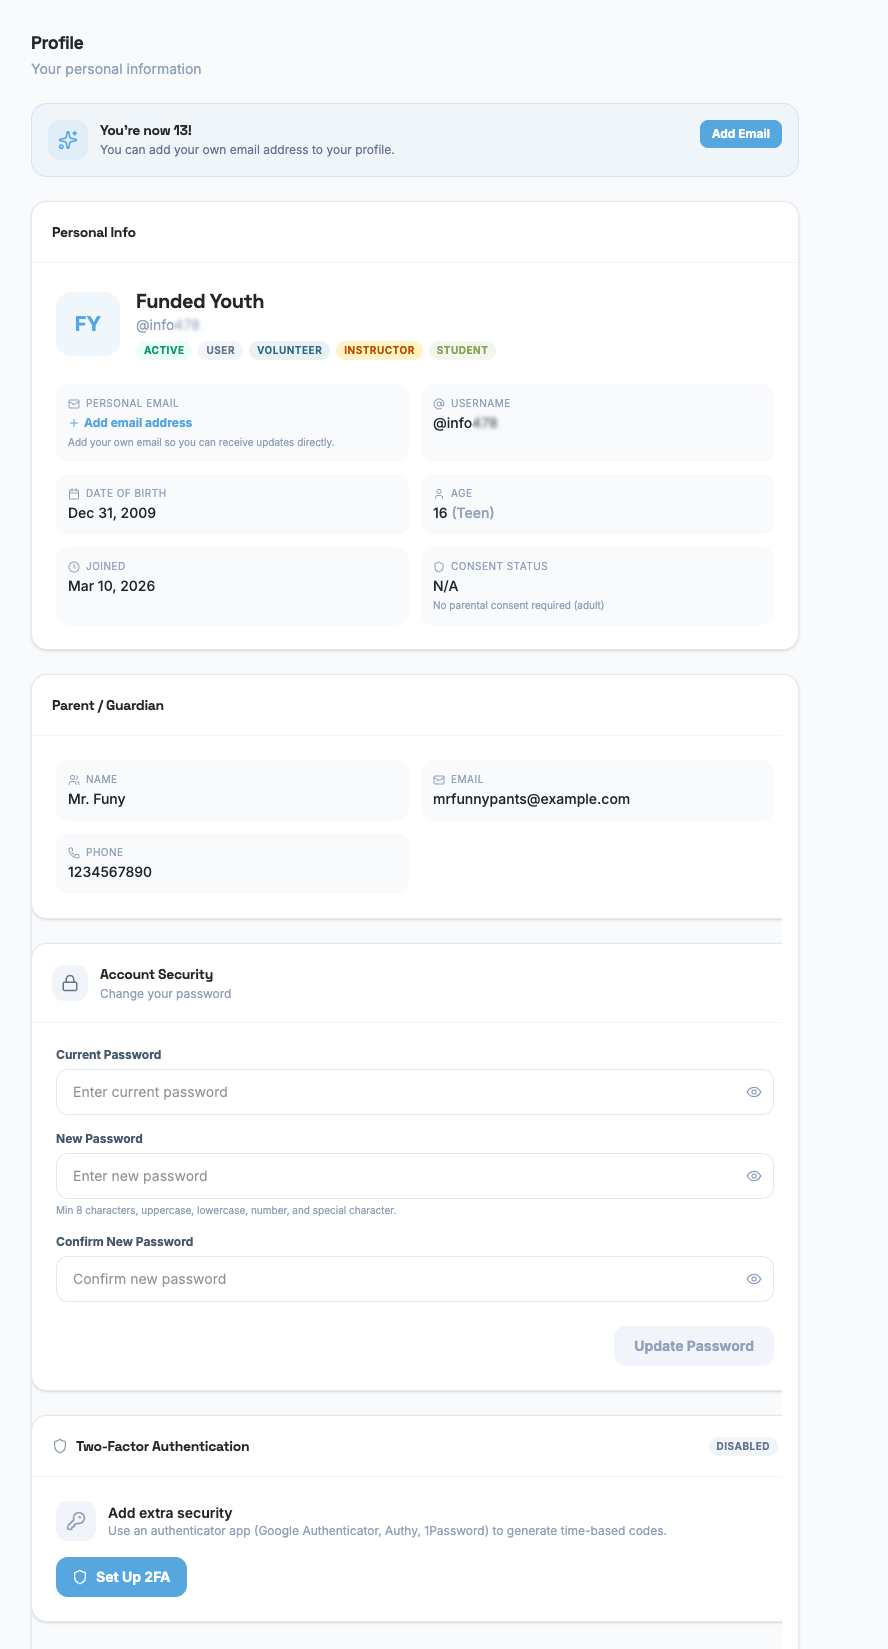
The Profile page is where you manage your personal information, change your password, and set up extra security for your account.
Your Profile Photo
Section titled “Your Profile Photo”At the top of the page, you’ll see your profile photo (or your initials if you haven’t uploaded one yet).
- To upload a photo: Hover over the photo area and click the camera icon. Pick an image from your device (JPEG, PNG, or WebP).
- To remove your photo: Click the small X button in the corner of your photo.
Your photo shows up throughout the portal wherever your name appears.
Personal Information
Section titled “Personal Information”Below your photo, you’ll see a card with your basic info:
| Field | What It Shows |
|---|---|
| First Name | The name shown throughout the portal (last names are not collected) |
| Username | Your @handle (e.g. bravelion_142). This is set when your account is created and cannot be changed. |
| Grade | The grade you selected at signup (K–12, Adult, or Other). Used to determine whether parental consent is required. |
| Join Date | When your account was created |
| Consent Status | Whether parental consent has been verified (for grades K–7) |
You cannot edit your first name, username, or grade from this page. If something is wrong, ask a FundedYouth administrator to update it for you.
Email Address
Section titled “Email Address”The email on your account is the address you use to sign in and the address that receives all account notifications.
- Grades K–7 — The email belongs to your parent or guardian. They handle email verification, parental consent, and any account notifications. The portal does not collect a separate email for the child.
- Grades 8–12, Adult, Other — The email is your own. Verification, account updates, and the welcome message all go directly to you.
To change your email address, use the Change Email flow on this page. You’ll receive a 6-digit verification code at the new address that you must enter to confirm the change.
Emergency Phone
Section titled “Emergency Phone”The emergency phone number you provided at signup is shown here. This is the number we’ll call if there’s an emergency at our makerspace and you (or your parent, for grades K–7) are not reachable through other means. It is encrypted at rest in our database.
If your emergency phone number changes, ask a FundedYouth administrator to update it for you.
Role Badges
Section titled “Role Badges”Next to your name, you’ll see colored badges showing your roles:
You can have more than one role at the same time. Roles are assigned by a FundedYouth administrator.
Changing Your Password
Section titled “Changing Your Password”The Account Security section lets you change your password. Here’s how:
- Enter your current password — the one you use to log in right now.
- Enter a new password — it must meet all of these rules:
- At least 8 characters long
- At least one uppercase letter (A–Z)
- At least one lowercase letter (a–z)
- At least one number (0–9)
- At least one special character (like ! @ # $ % ^ & *)
- Confirm your new password — type it again to make sure it matches.
- Click Update Password.
If everything is correct, you’ll see a green message saying “Password updated successfully.” If your current password is wrong, you’ll see a red error message.
Each password field has a show/hide button (the eye icon) so you can check what you typed.
Two-Factor Authentication (2FA)
Section titled “Two-Factor Authentication (2FA)”Two-factor authentication adds an extra layer of security to your account. When 2FA is turned on, you’ll need both your password and a code from an authenticator app to log in.
What You’ll See
Section titled “What You’ll See”- If 2FA is off: You’ll see a button to “Set Up 2FA” with a description of what it does.
- If 2FA is on: You’ll see a green shield icon and a message saying “2FA is active” along with how many recovery codes you have left.
- If you are an admin or instructor: 2FA is required. The badge will say “Required” in red instead of “Disabled.”
Setting Up 2FA
Section titled “Setting Up 2FA”- Click Set Up 2FA.
- A QR code will appear on screen.
- Open your authenticator app (like Google Authenticator, Authy, or 1Password) and scan the QR code.
- If you can’t scan it, click “Can’t scan?” to see a secret key you can type in manually.
- Click I’ve scanned it — Continue.
- Your authenticator app will now show a 6-digit code that changes every 30 seconds. Type that code into the box.
- Click Verify & Enable.
- You’ll see a list of recovery codes. These are backup codes you can use if you ever lose access to your authenticator app.
- Click Copy All Codes to copy them to your clipboard, then paste them somewhere safe.
- Click Done.
Turning Off 2FA
Section titled “Turning Off 2FA”- Click Disable 2FA.
- A warning message will explain what happens. For admin or instructor accounts, it will warn you that 2FA will be required again the next time you log in.
- Click Send Code — a 6-digit verification code will be sent to your email.
- Check your email and enter the code.
- Click Disable 2FA to confirm.
Getting New Recovery Codes
Section titled “Getting New Recovery Codes”If you’re running low on recovery codes (or used some already), you can get new ones:
- Click Regenerate Recovery Codes.
- Enter the current 6-digit code from your authenticator app.
- Click Regenerate.
- Your old recovery codes stop working and new ones are shown.
- Copy and save the new codes.
A yellow warning will appear when you have 2 or fewer recovery codes left, reminding you to regenerate.
Next Steps
Section titled “Next Steps”- Learn about the User Portal Dashboard
- See all available Agreements you may need to sign